Let’s Learn Godot 3D by making an Endless Runner Game — Part 2: Environment Setup👟
Setting up the environment is crucial for creating an immersive and visually appealing game world. It involves manipulating various aspects like lighting, fog, and skyboxes to enhance the overall aesthetic and mood of the scene.
Lighting not only affects visibility but also the game’s tone, so we will make our light nice and bright to open up our scene and make the space more “friendly”. Fog affects the player’s perception of distance, so we can use fog to stop our player from seeing too far ahead. The sky or skybox creates a spere that envelops the entire scene, so we can use this to provide us with a backdrop that can contribute to the game’s setting and time of day.

Figure 9: Scene with skybox, lighting, and fog.
In our project, let’s add a new Node3D node to our Main scene. This Node3D node will contain our environment objects, so let’s also rename it to “Environment”.
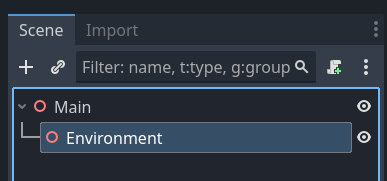
We’ll start by giving our scene some light. We’ll do this by adding a new DirectionalLight3D node to our Environment node. The DirectionalLight3D node in Godot represents a light source that emits light in a specific direction and affects the entire scene uniformly, like sunlight.
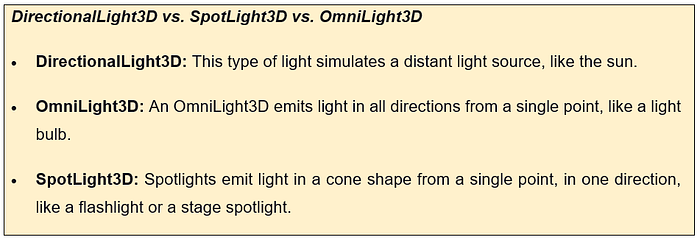
Add a new DirectionalLight3D node to your Environment node.

You’ll see that by default, it points to the right. We want our light to come from above and to the side, like the sun, and to do this we’ll need to change its x, y, and z transform properties. In Godot, the transform coordinate system is also based on the x, y, and z axes. Each axis runs as follows:
- X-axis: Runs left to right. When you increase the value along the x-axis, you move the object to the right. Decreasing the value moves it to the left.
- Y-axis: Unlike some other 3D engines that use the y-axis for depth, in Godot, the y-axis runs from bottom to top. Increasing the value along the y-axis moves the object upwards. Decreasing the value moves it downwards.
- Z-axis: Runs from front to back. In Godot, increasing the value along the z-axis moves the object away from the camera (into the screen), while decreasing the value brings it closer to the camera (out of the screen).
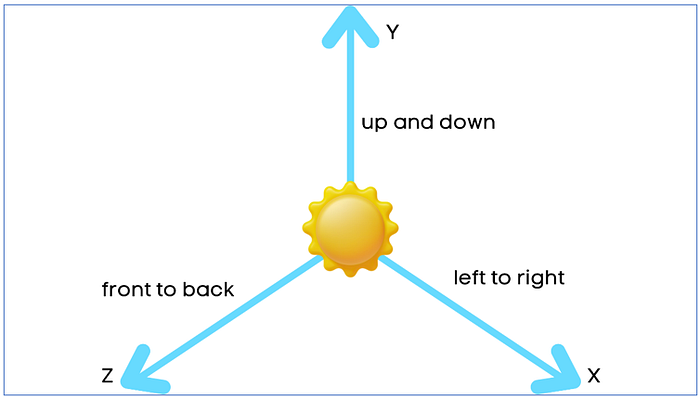
Figure 10: Axis overview.
Select your DirectionalLight3D node, and in the Inspector Panel, change its Position (x: -1, y: 600, z: -970) and Rotation (x: -50, y: 170, z: -150).

Press F on your keyboard to focus on your node and you will see that it is now shining from an angled position at the top of our screen.

We want our 3D objects to have shadows when the light hits them from our set angle. To do this, we will have to enable the Shadows property in our Inspector Panel. With your DirectionalLight3D node selected, enable shadows.

In this menu, you can change a lot of the shadow’s features. You can increase its blur, as to make it sharper or more fogged out, and you can increase its intensity. I recommend reading Godot’s Light & Shadow Overview to get a better understanding of all of these settings, including the Light settings where you can increase the light intensity and change the color of the light. We’re not going to be touching those settings, since the default settings are fine for our use-case, but we are going to change the opacity of our shadow to 0.5 so that our shadows are lighter.
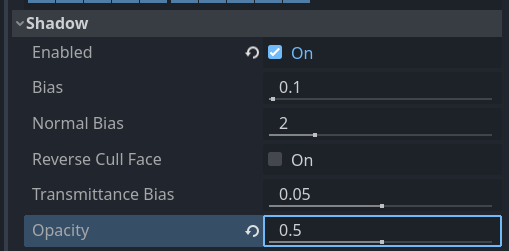
We’ll also want to change our Shadow Mode to change our shadow’s quality. If we leave our mode at “PSSM 4”, our shadow will be sharper. If we change our mode to “Orthogonal”, our shadow will be smoother, but a bit too realistic.
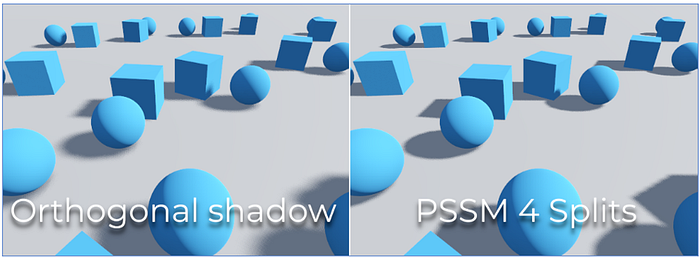
Figure 11: Orthogonal and PSSM shadows.

We want our shadow to be smooth but also have the sharp, stylized nature of our assets (cartoony), and thus, we should change our Directional Shadow Mode to “PSSM 2”. The default fade and split values are fine for our use-case.

With our light (and shadows) set up, we can move on to our sky and fog. Luckily for us, Godot combines both entities into one singular node, the WorldEnvironment node. The WorldEnvironment node is used to define global environmental properties that affect the entire scene. It serves as a container for the Environment resource, which holds a variety of settings that can change the look and feel of our game.
To our Environment node, let’s add a new WorldEnvironment node.

We’ll have to create a new Environment resource so that we can create our background (sky) and add our fog. Select your newly added node, and in the Inspector Panel underneath Environment, create a new resource.
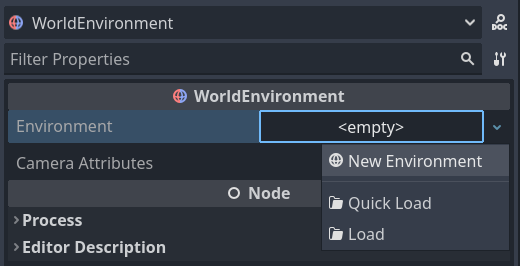
Let’s start by creating our sky, which will be our skybox that will serve as our games background, and it will surround the entire map.

Figure 12: Skybox that’s being used as the background.
Before we create our sky, we’ll have to tell our game that we are going to use our skybox as our background. We can set our background to other things as well, such as static colors, our camera feed, or even make it clear. We can set our world to use our sky as the background via the Background Mode property. Change the Background > Mode property to “Sky”.
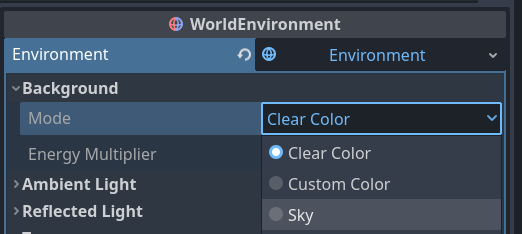
You’ll notice that your entire background is black, and that is because we haven’t created our sky yet — we’ve only told our engine to use our sky as our background. Now when creating our sky, we have a few options:
- ShaderMaterial: This is a generic material that can be used to write custom shaders.
- PanoramaSkyMaterial: This material is used when you have a panoramic (360-degree) image, often in HDR format, that you want to use as the skybox for your environment.
- ProceduralSkyMaterial: With this material, Godot generates the sky dynamically based on various parameters you can set within the editor. You can adjust things like the sun’s position, the color of the sky and horizon, cloud patterns, and more. It’s a flexible way to create a wide range of skies without needing a specific texture.
- PhysicalSkyMaterial: This is a newer addition to Godot that aims to simulate the sky with physically-based algorithms.
We are going to create our sky with a ProceduralSkyMaterial material since we want a default skybox that we can alter. In your Inspector Panel, add a new Sky resource, and to the material, create a new ProceduralSkyMaterial.


If you look around your scene now, you should have a default skybox added to your scene, and the background should use this skybox to make a greyish-blue sky in the distance.
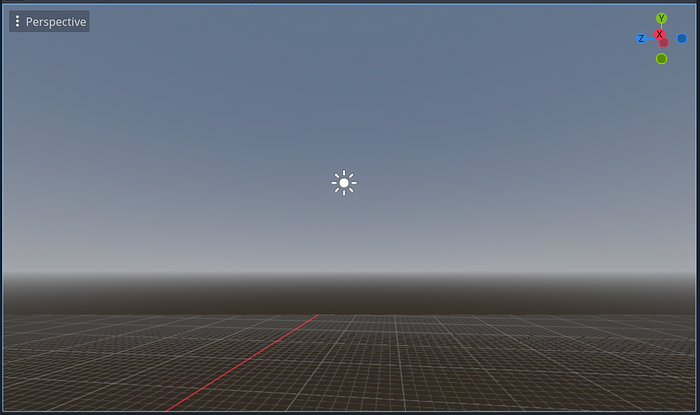
We want our sky to be a bit brighter. If you click on your ProceduralSkyMaterial resource, you should see that we can change the top and horizon colors of our sky. These colors will change the top part of our sky sphere.

Let’s change our top color to a bright blue with the hex value #5bd0ee, and our horizon color to a light pink with the hex value #bc9aba. You can change the color by clicking on the color property and adding the hex code in the bottom box.


We can also change the color of our ground, which is the bottom part of our sky sphere.
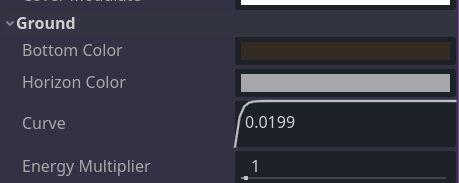
Since our game is taking place in a seaside environment, we can change our ground color to blue so that we can better emphasize the color of the ocean. Let’s change our bottom color to a bright blue with the hex value #4196dc, and our horizon color to a lighter blue with the hex value #71c0f7.

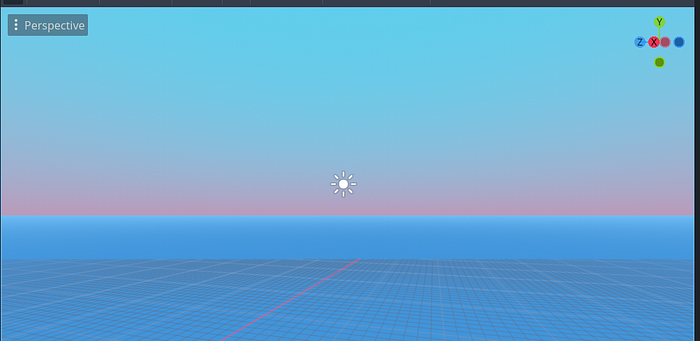
Finally, we can add our fog. In Godot, there are two options for adding fog in the WorldEnvironment node. If you add fog via this node, it will create fog all over your world. If you need a more focused area of fog, say only in one room, then you would use the fog from a FogVolume node instead.
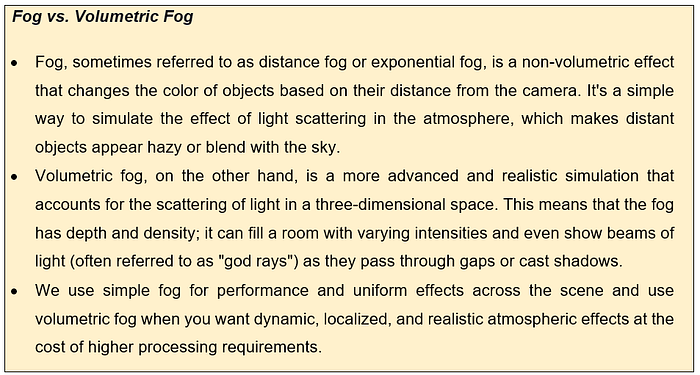
As I said, we have two options: fog and volumetric fog. We’re going to use normal fog because we are making a very simple game, and the rendering of our environment takes greater precedence than fog.
With your node selected, navigate down to Fog, and enable it.

We’re going to change three options here: the light color, light energy, and the sky affect. The “Sky Affect” parameter determines to what extent the sky contributes to the fog’s appearance. Basically, it adjusts how much the color and brightness of the sky influence the color and brightness of the fog. The “Light Energy” parameter determines how bright the fog is, due to its own light rather than light it scatters from other sources.
Change both the sky affect and light energy to 0.3 — because we want the fog to be dim and distanced. Then, change the color of the fog to #4c95c0.
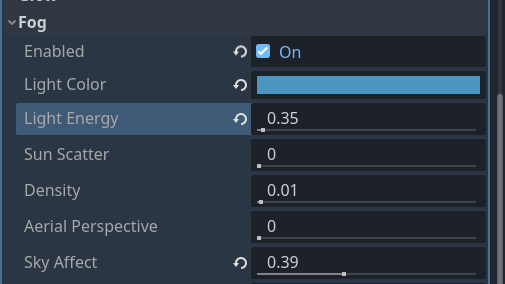
Your scene should now be filled with a little bit of fog. This will help us with blurring objects that are far in the distance in the future.

Figure 13: Without fog.
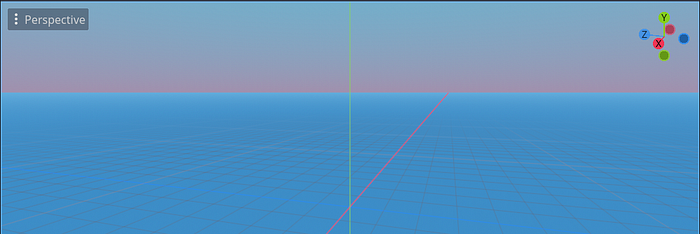
Figure 14: With fog.
And there we have our environment set up. In the next part, we will set up our player animations and our state machine.
Unlock the Series!
This series will be turned into a video series on my YouTube channel, but if you like this series and would like to support me, you could donate any amount to my KoFi shop or you could purchase the offline PDF for $4 that has the entire series in one on-the-go booklet!
This PDF gives lifelong access to the full, offline version of the “Learn Godot” PDF booklet. This is a 291-page document that contains all the tutorials of this series in a sequenced format, plus you get dedicated help from me if you ever get stuck or need advice. This means you don’t have to wait for me to release the next part of the tutorial series on YouTube, Dev.to or Medium. You can just move on and continue the tutorial at your own pace — anytime and anywhere!

This book will be updated continuously to fix newly discovered bugs, or to fix compatibility issues with newer versions of Godot 4.
