Let’s Learn Godot 3D by making an Endless Runner Game — Part 3: Player Setup & Animations👟
With our environment created, we can go ahead and start with creating our player, who will move forward when we start the game, and we’ll be able to move them left, right, and up. If you look in your Assets directory, you’ll see that I already downloaded our player mesh and all of their animations. But let’s say you want to use your own character with different animations. Don’t worry, I’m going to show you how to do that!

Figure 15: Our player. The FBX scene contains our rigged player skeleton and mesh, and the .png files contain the materials for our mesh.
Okay, so let’s first see where we can find a 3D character. Please don’t drag any of the animations and 3D characters into your current project — create a separate “test” project for this as this part will just show you how to get your own characters and animations. I thought this would be valuable for you since you’re probably learning 3D development to make your own games.
You can find 3D characters on most asset stores — but the one that might be the best for Godot is itch.io. Just make sure that the character that you download is rigged — or that you know how to rig a character in software such as Blender. A rigged character has been given an internal, movable skeleton, known as a rig. This rig is used to animate the character in a 3D environment.
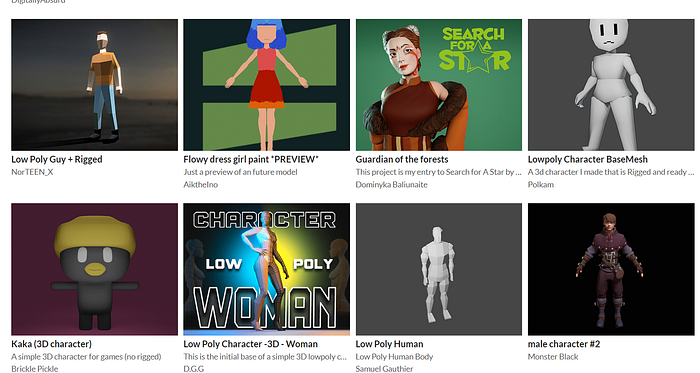
Another place to find base characters for a demo game (like ours) is Mixamo, which is the place where we also find our animations. You’ll see that this is where I found AJ, our runner character!

Let’s download a simple and free rigged character on Itch.io, then upload it to Mixamo so that we can animate them. Download this PSX-styled secretary by Vinrax.

Unzip the downloaded folder, and you’ll see inside the folder is the fbx for the character. Remember, this FBX contains the character’s mesh, collision, rig, and materials.

Let’s head back to Mixamo and select the option to “Upload Character”. You want to upload your secretary character’s .fbx here.


You can now search for and play any animation, and the animation should play on your uploaded character.

When you’re happy with your animation, you can press download. We want to download the player with the skin because this will apply the animation directly to our character, which we need for Godot!

And then you can just drag it into your project.
Now, since this was a demo to show you how to download and animate characters, we’re not going to continue with our secretary character. No, instead we’ll go back to our project and set up our player with the animations for our AJ character. You’ll see in your assets directory we have a base fbx, which is our player’s base skeleton (so, think of your initial downloaded secretary), and then we have fbx files for our animations.
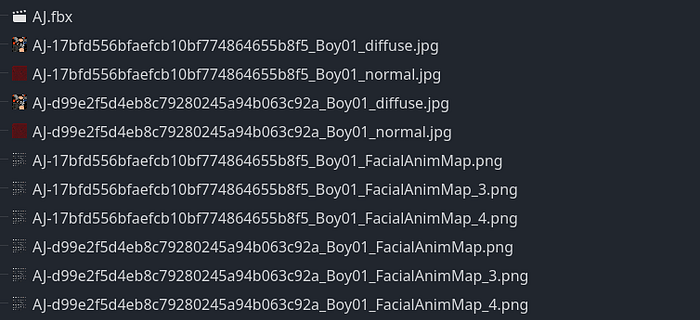
Figure 16: Our base character

Figure 17: Our animations.
PLAYER SETUP
Let’s create a new scene with a CharacterBody3D node as its root node. A CharacterBody3D is a type of node that is used for characters that need to be controlled via code, especially in cases where physics simulation is required for movement.
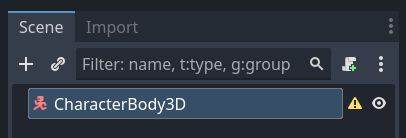
Rename this root node to Player and save the scene underneath your “Scenes” folder.

You’ll see that next to the newly added node there is a yellow warning symbol. If you click on it, it tells us that our node needs a collision shape — because it’s a physics body, and for it to interact with other bodies in our game, it needs a collision.

Let’s add a CollisionShape3D node to fix this. In the Inspector Panel, we’ll assign a simple CapsuleShape3D to our collision, which will encapsulate our entire player.
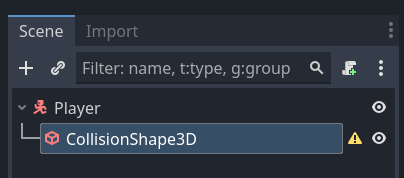

Depending on your character, you can make this shape bigger or smaller via its radius and height properties.

Now, let’s drag our AJ.fbx (our base character) into this scene.

We want to open up this FBX scene so that we can see our players skeleton, and get to our AnimationPlayer node, which the fbx adds all of our player’s animations to. To do this, we should right-click on our “Root Node” and select the option to make it local. “Make Local” will make the scene local to our current scene, so that we can treat the nodes as individual components instead of instanced scene components.


From this localized scene, delete the node named “Bottom”. It has no functionality, so delete it.
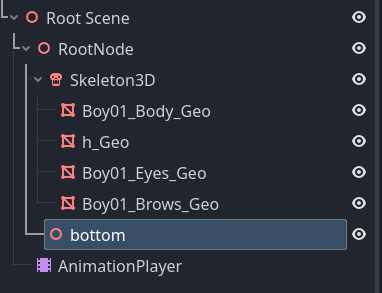
Select the “Root Scene” node and move it down into the collision shape.
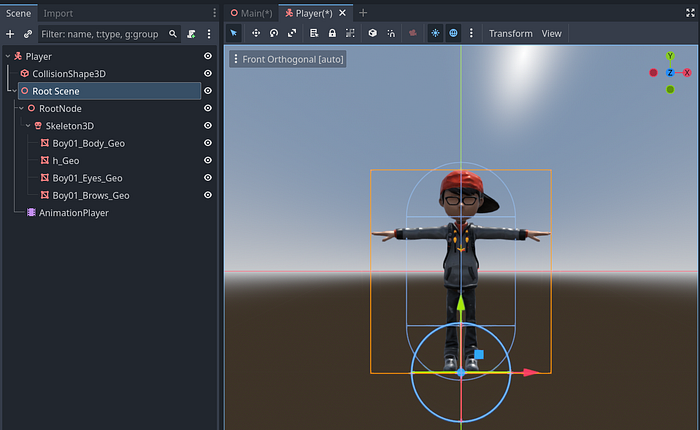
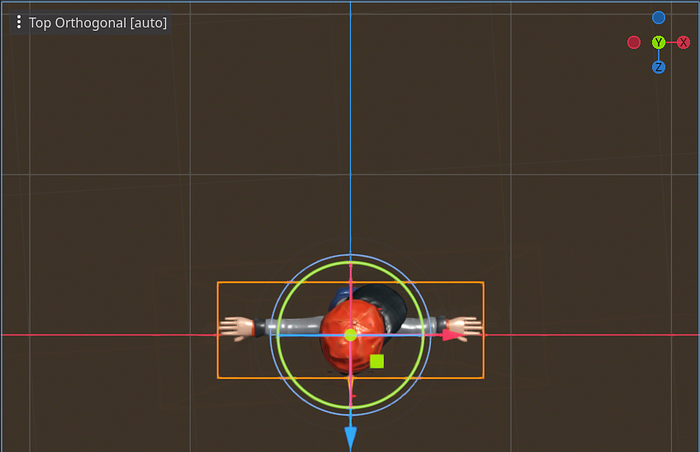
You’ll see that your Skeleton3D node contains your rig with all of your bones, and all the MeshInstance3D nodes within it contains the “skin” that form over these bones.


Figure 18: Our rigged skeleton.

Figure 19: Our player’s skin.
The “skin” has a 3D mesh, is assigned to the skeleton, and it also has an assigned material.

You’ll notice that his mouth and eyes are missing, and this is because the mesh instances have no material assigned to them.

Select your “h_Geo” node (which is our mouth), and in its Surface Material Override property, drag in your “Boy01_FacialAnimMap.png” material, which can be found underneath the Player > AJ.fbm directory. This material contains the mesh for our player’s facial features.

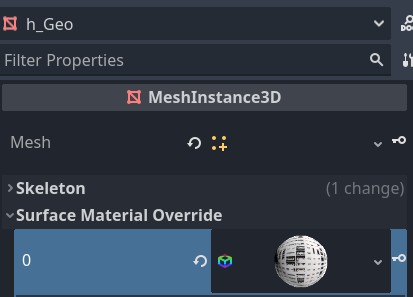

To get rid of the white overlay, select the material property that you just added and navigate to Transparency > Transparency, and change the mode to “Alpha”.
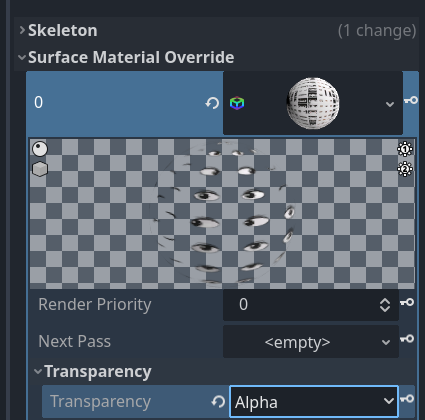

Let’s follow the same steps for our “Boy01_Eyes_Geo” and “Boy01_Brows_Geo” nodes. Your final face “skins” should look like the image below.

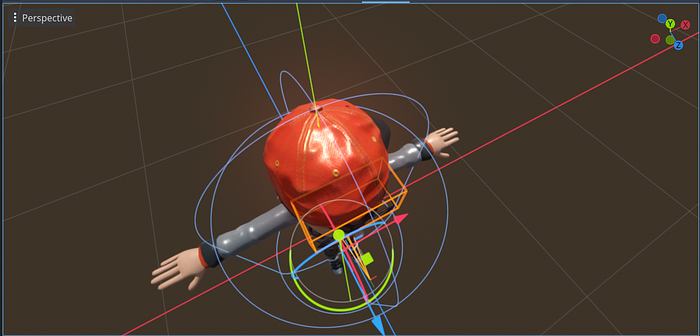
Our player is also a bit too shiny, and this is because of their specular value on the default material that the engine added to the “Boy01_Body_Geo” node.
Material layers in game development are used to create realistic and visually appealing textures on 3D models. Each layer serves a specific purpose in simulating how light interacts with the surface of objects. Here’s an overview of some common material layers used in games:
Albedo (or Diffuse):
- The albedo texture doesn’t contain any lighting information; it only stores the colors as they are.
Normal Map:
- This creates the illusion of depth and detail by affecting the way light bounces off the surface, which can make a flat surface appear textured.
Roughness (or Glossiness):
- The roughness layer controls how shiny or matte the surface appears. A low roughness value indicates a smooth surface that reflects light sharply, like a mirror, while a high roughness value will scatter light, giving a more diffuse reflection.
Metallic:
- This layer determines how metallic a surface is. Non-metallic materials (like wood or plastic) have low metallic values, while metals have high metallic values.
Specular:
- Specular maps define the reflectivity of a surface at direct angles of light. They can be used to create varying levels of shine across different parts of a material.
Ambient Occlusion:
- It’s a way to add soft shadows in areas where light has a harder time reaching, enhancing the realism of nooks and crannies.
Emission (or Emissive):
- Emission textures make parts of a material emit light of their own. This can simulate effects like glowing screens, bioluminescent creatures, or hot metal.
Opacity (or Transparency):
- Opacity maps define the transparency of different areas of a material. They can be used to create effects like glass, water, or semi-transparent fabrics.
To get rid of the specular value, we need to drag our diffuse/albedo material into our “Boy01_Body_Geo” nodes Surface Material Override property.

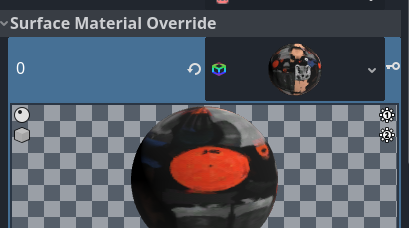
You can also play around with the material layer values.

Your player should now be shine free and have a face!

ANIMATIONS SETUP
If you select your AnimationPlayer node, you will see that each bone of our Skeleton3D node has been animated for each frame within our animation.

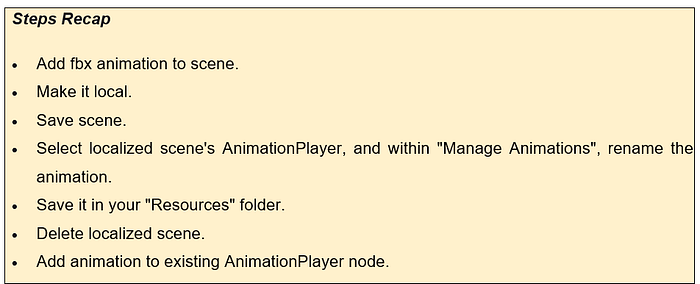
To add an animation from our downloaded FBX animations, we’ll need to drag each fbx scenes into our folder and get the animations from their trees. We’ll save these animations, and then add them to our pre-existing AnimationPlayer node. Okay, let’s break this down into steps. Let’s start with our “Idle.fbx”, which contains our idle animation.

Drag this fbx into your scene tree and make it local to your scene.


Save your scene. Select the AnimationPlayer node from this scene, and in the panel below, select the option to “Manage Animations”.

Double click the “mixamo” animation, and rename it to “Idle”.


Select the save icon next to your Idle animation, and let’s save it underneath a new folder called “Resources”.

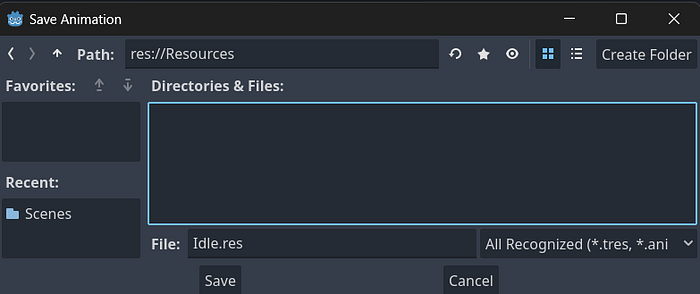
We now have our animation saved, and our animation can be added to any other body that has the exact same skeleton as our Idle.fbx scene — so, in other words, it can be added to any other AnimationPlayer node that is assigned to our AJ character.
Delete the localized scene — we don’t need it anymore since we’ve gotten the animation that we needed from it.
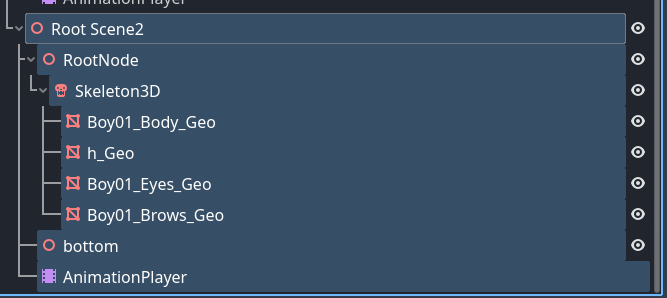

We need to add the animation from our Resources folder to our initial AnimationPlayer, so head into the “Manage Animations” panel in your AnimationPlayer node. You can delete the two default animations within it.

Click the folder icon next to the AnimationLibrary and load the saved Idle animation.
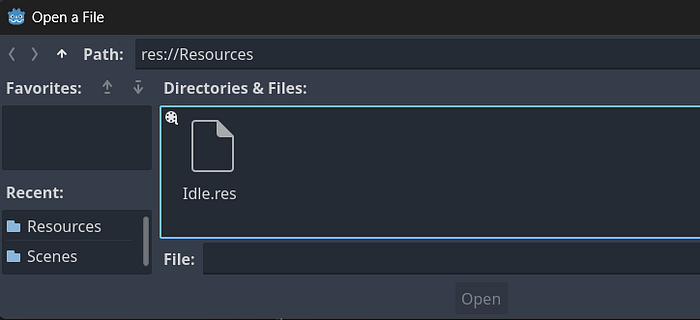

You’ll see that the animation is automatically added to our Skeleton3D node. Enable the “looping” option so that our idle animation can loop.


If you play the animation, it should loop and it should play.

Let’s follow the same step for our Running (save as Running) and RunningJump (save as Jump) animations.



We want to enable looping for our Running animation as well.

And then we also want to prevent our player from moving forward when they jump. All our animations should play in place. So, to do this, we need to disable our player’s hips when they jump, since this moves them forward.

And that is our animations set up for our game!

ANIMATION STATE MACHINE
Now all we need to do is to add these animations to an Animation State Machine. This state machine allows for a smooth animation flow, ensuring that the character’s visual state always matches their gameplay state. The system looks for conditions or triggers set in the code or through player interaction to move from one animation to another, creating a dynamic and immersive experience.
Our state machine will play the idle animation when the level is loaded. When we start the game, our machine will switch over to the running animation, and when we jump, we will switch from the running animation to the jumping animation. After the jump is complete, we will switch back to the running animation, and if the game ends, we will switch back to the idle animation.
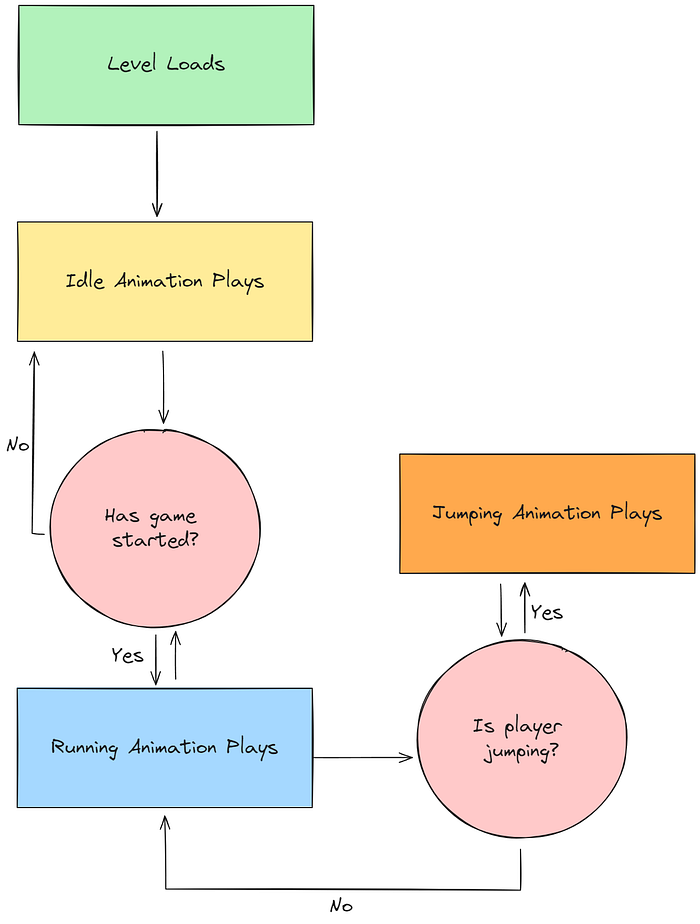
Figure 20: Overview of our state machine.
We use the AnimationTree node to add a State Machine. It’s used to manage different animations and how they blend together based on certain parameters or conditions. Let’s add this node to our Player scene tree. Make sure to add it to your node hierarchy where your AnimationPlayer is.

You’ll see that it too has a warning next to it, and that is because we have to give it a root animation node. The root animation node determines the starting point of the animation playing, and it can be one of several types of nodes that handle animation data in different ways:
- AnimationRootNode: This is the base node type for an animation tree. It doesn’t do anything on its own but serves as a container for more specialized animation nodes.
- AnimationNodeBlendTree: This is a complex node that can contain various other nodes to create intricate blends and state machines.
- AnimationNodeBlendSpace1D/AnimationNodeBlendSpace2D: These nodes allow you to blend animations along one or two axes respectively, typically used for blending different locomotion animations like walking, running, and sprinting based on parameters like speed or direction.
- AnimationNodeStateMachine: This node lets you create a state machine for your animations.
- AnimationNodeAnimation: Represents a single animation.
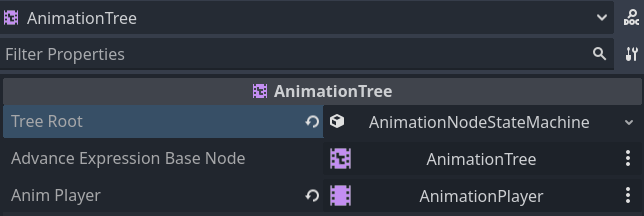
In the Inspector Panel, let’s add a new tree root of type AnimationNodeStateMachine — since we want to play our animations via a state machine.


This will create a State Machine in our AnimationTree panel below.

We also need to assign our AnimationPlayer node to our AnimationTree node’s “Anim Player” property, because we want to access the animations that we added to it in our state machine.
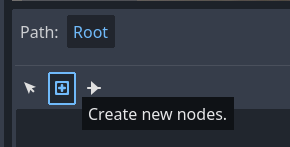
Now, in our state machine below, let’s add our three animations. Select the “Add Node” tool above, and then click anywhere in your state machine panel to add an Animation.

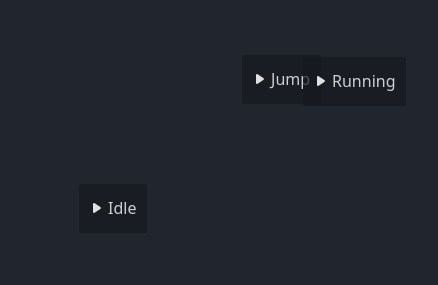
You can move them around with the select tool.
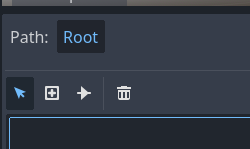

With the “Transition” tool we can add connections between our animation nodes. This will state which animation plays after the other. Here’s what each transition type generally means:
- Immediate: The new animation starts playing immediately, overriding the current one without any blending. The switch is abrupt, and the current animation stops at the point it is in when the transition is triggered.
- Sync: This transition type starts the new animation in a way that is synchronized with the current animation. For example, if you’re transitioning from a walk cycle to a run cycle, the transition will start at a point in the run cycle that matches the current position in the walk cycle. This helps maintain continuity in movements, especially for looping animations.
- At End: With this transition, the new animation will only start after the current one has finished playing. This is useful for non-looping animations where you want the entire sequence to complete before moving on to the next one, such as an attack animation followed by a return to an idle pose.
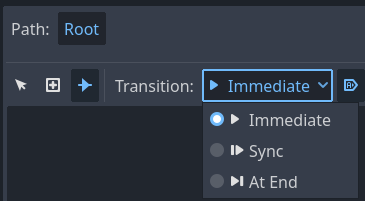

We want the switch from Start to Idle to be immediate, because when our level loads, we immediately want our player to be in an “idle” or waiting state. If you select the line, you can also change the transition switch in the Inspector Panel.


From Idle to Running, we want to add a transition with a switch type of “Sync”, because we smoothly want to transition from our idle to our running animation.


Then add an immediate switch back to our Idle animation, because if we stop running, we will immediately return to idle and end the game.


We only want to move from Idle to Running if a certain condition is being met. This condition is when our game starts. Our game will start when the player presses ENTER. We can define this condition by selecting our animation transition line between Idle to Running, and in the Inspector Panel, underneath Advance > Expression, giving it a condition. In our case, we will give it the expression “game_starts”. This is a boolean expression that evaluates to true or false based on game logic. This condition would be set to true in our code when we start our game, and false when we complete or fail the level.
Select the transition between Idle → Running and add the expression “game_starts”. Remember, we will set this value to true/false in our code later on, so if it’s true, the running animation will play.


If the game is over, so our “game_starts” boolean is set to false later on in the code, then we will transition from Running to Idle. Select the transition between Running → Idle and add the expression “not game_starts”.


We also want our Idle to Running animation to be smoother as it syncs from one state to the next. To do this, we need to give it an xfade_time. “Xfade time” refers to “crossfade time,” which is a setting used during animation transitions to define the duration over which two animations blend into each other. When transitioning from one animation to another, rather than abruptly switching from the first animation to the second, a crossfade will smoothly interpolate between the two.
Getting the right xfade_time requires playing around with the transitions as the right length of xfade time can depend on the specific animations and the context within the game. Select the Select the transition between Idle → Running and change the xfade_time to 0.3 seconds.


If you press the play icon on your Running animation, the animation transition should be smooth, but if you press play on your Idle animation, the transition should be immediate. Now, let’s add our Jump animation transitions. We will add a “Sync” transition both to and from the Running animation to the Jump animation.

We will also add an Immediate transition from our Jump to our Idle, with the expression “not game_starts”, because if we die or complete the level with jumping, we want to immediately go back to idle.

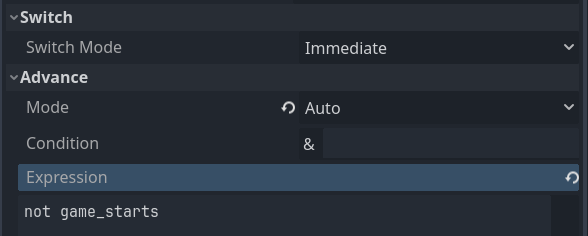
From Running → Jump, we will change the xfade_time to 0.3 seconds, and we will give it the expression “is_jumping”. This is another boolean that we will set up in our code, which will play the jump animation if true, and play the running animation if false.

Then, after jumping, we will immediately play the running animation without an expression. Change the xfade_time from Jump → Running to 1 second.

And there we have our animations, animation state, and player skeleton set up. In the next part, we will set up our player camera and movement, so that we can see these animations in action.
Unlock the Series!
This series will be turned into a video series on my YouTube channel, but if you like this series and would like to support me, you could donate any amount to my KoFi shop or you could purchase the offline PDF for $4 that has the entire series in one on-the-go booklet!
This PDF gives lifelong access to the full, offline version of the “Learn Godot” PDF booklet. This is a 291-page document that contains all the tutorials of this series in a sequenced format, plus you get dedicated help from me if you ever get stuck or need advice. This means you don’t have to wait for me to release the next part of the tutorial series on YouTube, Dev.to or Medium. You can just move on and continue the tutorial at your own pace — anytime and anywhere!

This book will be updated continuously to fix newly discovered bugs, or to fix compatibility issues with newer versions of Godot 4.

