Let’s Learn Godot 4 by Making an RPG — Part 1: Project Overview & Setup 🤠
Have you ever wondered what made Arthur Morgan from Red Dead Redemption so iconic? For me, it’s the nostalgic feeling that arises when I get to play in an era that I would never be able to experience in real-time. It’s the magic of fantasy, and that is what brought me to create the rootinest-tootinest 2D RPG game tutorial series out there, made with no other than Godot 4 and GDScript. This tutorial series aims to teach you how to make a game from start to finish, and ultimately show you all the things that you need to know as a beginner Godot developer!
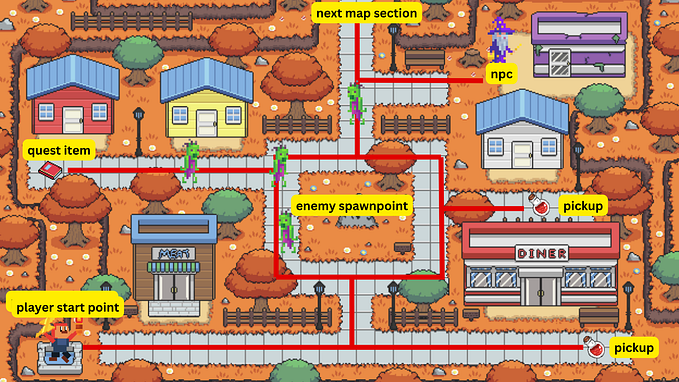
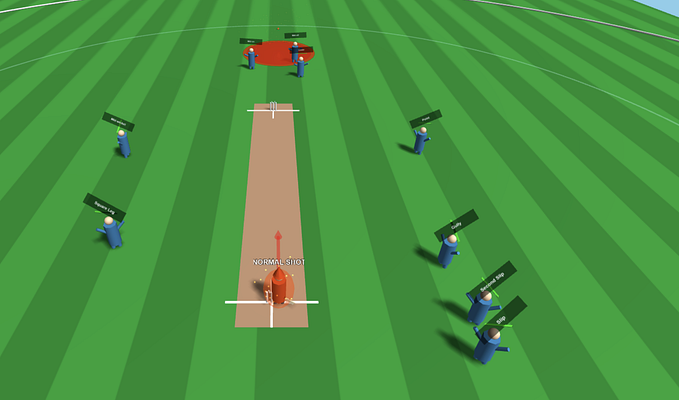
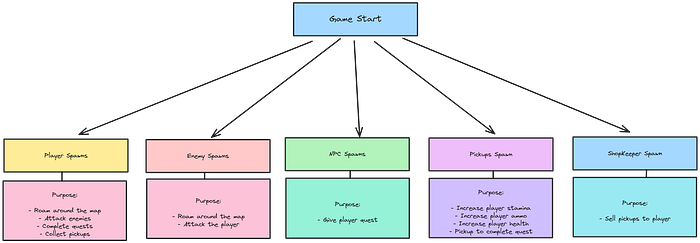
So what exactly is this game that we will be creating about? Well, Dusty Trails is a Western-esque, Wildwest RPG in which our player can run around a full map, whilst shooting and looting enemies and completing quests. Enemies will spawn randomly, and they will roam and chase the player if they are close to the player. We’ll also have NPC’s and a Shopkeeper, which will give our player quests and sell pickup items to our player.
What is an RPG?
An RPG, or Role-Playing Game, is a genre of video game where players assume the roles of characters in a fictional setting. Players take responsibility for acting out these roles within a narrative, either through literal acting or through a process of structured decision-making regarding character development. RPGs often involve story-telling, world-building, and character progression.
This tutorial series will cover the following aspects:
- Player Animations, Movement, and Statistics
- Complete Game UI
- Pickups and Consumables
- Enemy Movement, Animations, and Statistics
- Enemy Random Roaming & Spawning
- Random Loot Drops
- Player & Enemy Death, Damage, and Attacks
- XP and Leveling
- Basic Customizable NPC with a Quest
- Scene Transition (Location Changing)
- Game Music & SFX
- Persistent Saving, Pausing, and Loading System
- Game Map with Collisions & Camera
- Simple Shopkeeper
- Project Exporting
Please note that this tutorial series is meant for beginner GDScript & Godot developers. Also, this tutorial uses Godot version 4.1.1 — so if you run into errors when using a newer version, please don’t panic as this might happen. I’ll try and update this project as much as possible to work with newer versions of Godot. I’ll also link the sectional source code to each part at the end of the individual chapters so that you can easily compare the projects’ code to yours.
WHAT YOU WILL LEARN IN THIS PART:
· How to navigate through the Godot Editor.
· How to change your project settings, as well as work with node properties.
· How to create scenes.
· How to add nodes to scenes.
EDITOR OVERVIEW
Before we get crazy and begin coding, we first need to understand the layout of the Godot Editor. If you are already acquainted with the editor, you can skip to the Project Setup section of this part, but if not, I’d advise you to take a tour of the editor with me.

If you haven’t installed Godot yet, head on over to their website and download the latest version that is available to you. Once it’s done downloading, extract the file, and since Godot does not require any installation, you can just drag this to where you prefer to have it stored on your computer — or open it directly from your Downloads folder.

Launch the executable, and you’ll be met by the Project Manager window. Here you can create new projects, load existing projects, or scan entire directories to import multiple projects.
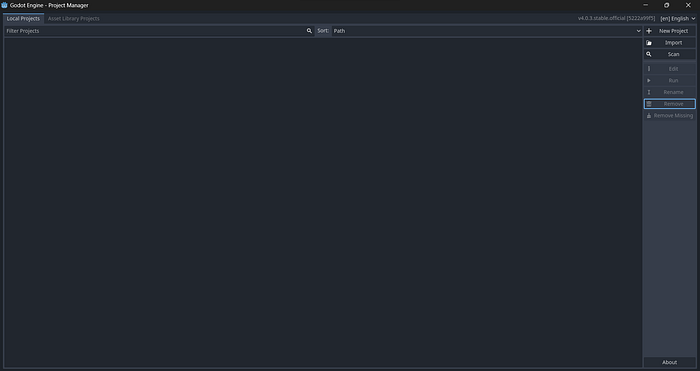
On top, you will see a menu called “Asset Library Projects”. This is where you can download and find projects, templates, or demos that are made for Godot by community members. It’s similar to other online marketplaces such as Itch.io, Unreal Marketplace, or the Unity Asset Store. The only difference is that everything here is free.

To create our project, we’ll click on “New Project”, and a window will appear where we will choose our project’s save location as well as give it a name. I named mine Dusty Trails but go ahead and call it whatever you want.
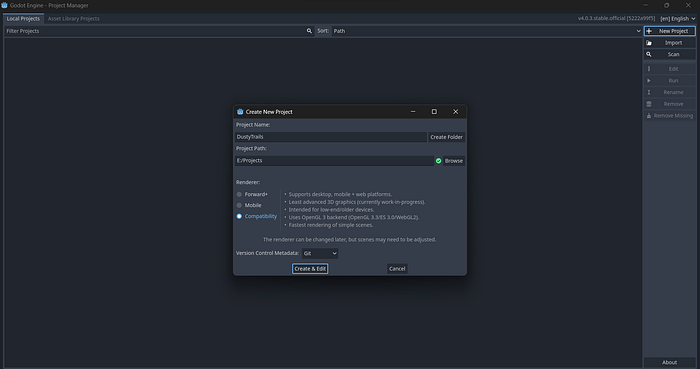
What are the rendering modes?
Forward+ mode, which is for more upscaled game projects that are more graphics and rendering intensive.
Mobile mode, which is generally used for mobile games.
Compatibility mode, which uses the same renderer as Godot 3, meaning the graphics and rendering quality is lower making it more suitable for older or more low-spec devices.
You can start your game either in Compatibility or Forward+ mode — it just depends on if your Graphics Driver supports the Vulkan version provided with Godot. You can read more about the new rendering updates here.
Select “Create & Edit”, and you’ll be magically transported to the Project Window. On top, we have our workspaces, which is the space in which we complete our tasks. 3D will always be active by default. If you click on the other options, you can switch between the different workspaces.
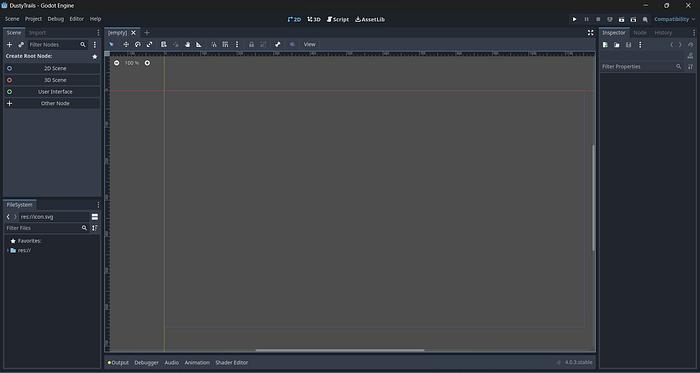

What are the workspaces for?
The 2D workspace is used to edit and view 2D scenes for 2D games.
The 3D workspace is used to edit and view 3D scenes for 3D games.
The Script workspace is the code editor where we write, edit, and view our scripts.
The AssetLib workspace is the Asset Library Projects that you can use in your projects for free.
The panel on the left side of the window is the Scene Dock. This lists the content of the current scene that you have open, and you can also add new nodes to your scene in this dock. A scene in Godot is the main holder or container for nodes, and nodes are the main building blocks of your game.
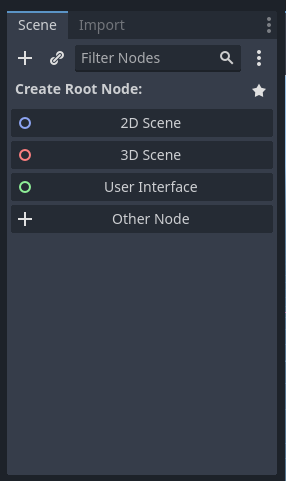
Different nodes have different functions, for example, collision shapes and animation sprites each have their purpose, so having the ability to combine them in a singular scene allows us to create components for our game with more complex functions. Scenes can also instantiate other scenes, for example, having enemy scenes in your world scene. I recommend you go and have a look at the Godot Documentation on Nodes & Scenes.
What is a Scene and a Node?
A scene is a container that holds a collection of nodes arranged in a hierarchical structure — such as our Player or Enemy. A node is the basic unit within a scene that makes up the scene — such as a Sprite or Camera within our scene.
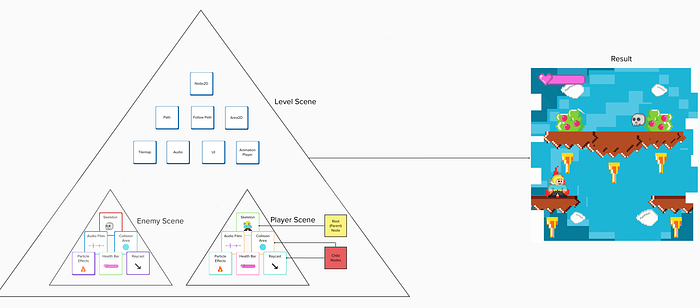
The other panel is called the Import Dock, and this is where you can set or edit the properties of assets such as images, fonts, and audio files that you’ve added to your project folder, and then you can reimport them with those properties saved.

Below the Scene and Import Dock, you will find the FileSystem panel, which is where you’ll manage your project files, folders, and assets. You can drag new assets into this panel to import them into your projects, as well as add new folders, scripts, scenes, and more.
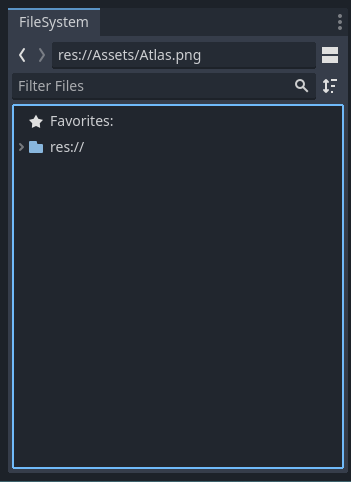

The panel on the right side of the window is called the Inspector Panel, which is where you can view and edit the properties of currently selected nodes.

The Node Panel next to it is where you can hook up Signals and add Groups to nodes. Groups can be used to group types of scenes or nodes together, for example, our NPCs, so that our player knows how to interact with those nodes. Signals can be used in many cases, for example, to notify the game that a button has been pressed or that an animation has finished playing. This allows us to then tell the game what to do when certain events have occurred. Most nodes have built-in signals, such as buttons and animation players, but we can also create our own custom signals. We’ll explain these concepts a bit more in-depth later on.


Above the Inspector and Node Dock, you will see the options we will use to play, pause, restart, or stop our scenes. This is where we will launch our game to test it.

At the bottom of the Editor window, there is the Output Panel, the Debugger Console, the Audio Mixer, the Search Results Panel, and the Animation and Shader Editor. They are collapsed by default to save screen space, but if you click on them, they will maximize. Certain nodes that are customizable, such as the tilemap or animation-player node, will add new options to this window.


Let’s go over each of the pre-existing options:
- The output console will return printed messages or notifications that we add to the code for testing.
- The debugger console is used for — you guessed it — debugging and error handling.
- The audio mixer is used to edit audio files.
- The animation editor is used to create animations for the Animation Player node.
In the Ribbon or Menu bar above, you have a few options. Here you can manage your scenes underneath the Scenes tab. Scenes can be added, saved, opened, or closed.

You can manage your project settings and properties (such as input actions, window size, autoload singletons, etc.) underneath the Projects tab. You can also quit your Project Manager window from here. This is also where we will export our project from.
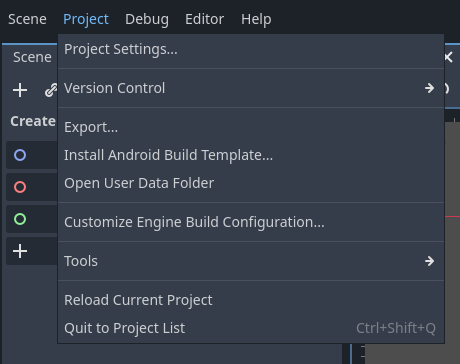
You can enable or disable debugging tools in the Debug tab, for instances where you want to say, make collisions visible so that you can see if collision events are executing during gameplay.

The Editor tab allows you to change settings related to the editor, for example, you can change its current layout or theme. You can even take screenshots of your current window.
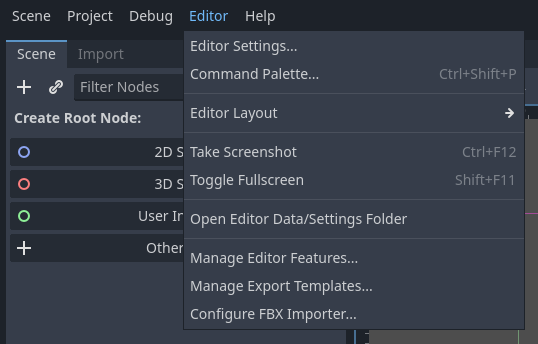
And lastly, the Help tab gives you quick access to the Godot 4 documentation and community forum. If you’re feeling a bit more comfortable with working with the editor, we can go ahead and set up our project.

PROJECT SETUP
Before I start a project, I generally make a list of steps (or checklist) that I need to take to make the game. This is generally just an outline, and I make different amendments to these steps as I go about actually making the game.
One thing to remember about game development is that this is not supposed to be a linear journey. Everyone goes about this differently, but if you’re interested in what my steps usually look like, you can view this example of the Dusty Trails project’s steps here and use it as a boilerplate for your own game (or don’t, it’s 100% up to you). I’m also using this color palette that I found online for this game, just in case you were wondering where I got my color scheme values from!
Now, onto the setup. The assets you will need for this section can be downloaded here. The credits for these free assets can be found on my GitHub repository. Once you’ve downloaded your assets, extract the file, and drag it into your FileSystem panel. We can also go ahead and delete the default icon.svg and README.MD files that are present in your project.

Right-click on the panel and let’s create three new folders: Scenes, GUI and Scripts. The Scenes folder will contain all of our .tscn files (player scene, NPC scene, map scene, etc.), the Scripts folder will contain all of our .gd files, and the GUI folder will contain all of our UI element scenes (menus, popups, HUDs, etc).


In the Scenes folder, let’s create our first scene, which will be our Main Scene. The Main Scene is the scene that will serve as the core container for our game elements. It is here where we will add our map, characters, and items so that we can play the game. The Main Scene is also the one that runs automatically when the game launches.
To add a scene, you can right-click on the FileSystem panel and add it like we added our folders, or you can click on the plus icon in our Scene Dock. This is the quicker way, so I will do it that way from here on out.

You will see that it will prompt you to select a node. The node that you choose here will be the root or parent node. The root node is the highest node in the tree structure and has no parent.
We can always change this node later on, so don’t worry if you choose the wrong one! We need to select Node2D as the root node. The Node2D node is the base node for a 2D game. We usually use this node in our Main scene.

You can also automatically choose this node to be your root node in the Scene Dock “2D Scene” option.
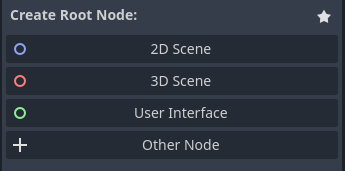
You will now see that a Node2D node has been added as our root, but our Scene hasn’t been saved yet. Save it in the Scenes menu above or use the shortcut CTRL + S. Save the Scene as “Main” in your Scenes folder.


Double-click on the Node2D root node to rename it. Let’s rename it to match the name of our scene, just for simplicity.
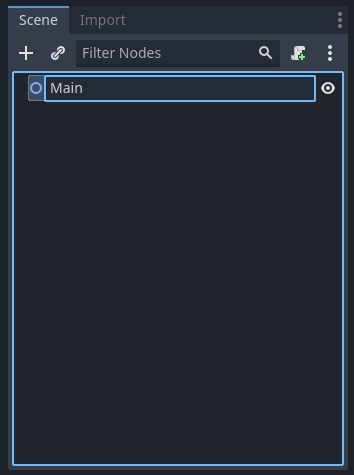
Now we can add children nodes to our root node. You can do this via the plus icon again. Remember, we are making a 2D game, so nodes that end with “3D” will not work with our node! Let’s add a Sprite2D node for now because I want to show you something. Take note that any node you add will be added to your recent panel in the node menu, so you can easily select it from there next time without having to search for it!


In the 2D workspace (because we are making a 2D game), select your Sprite2D node and press F on your keyboard to focus on your selected node. With your node selected, in the inspector panel, you will see the option for texture. This is our sprite’s image.

If you go into your assets folder, you can drag any image you want into that texture property.

If you zoom in on your sprite, you might notice that it is a little bit blurry. This won’t do, but luckily, I have a fix for you.

In your projects settings option underneath Project > Project Settings, change your Textures Rendering from Linear to Nearest. This will scale up our texture rendering so that image assets are always high quality.
What is texture filtering?
Texture filtering is a technique used in computer graphics to improve the appearance of textures when they are applied to 3D models or 2D images. It becomes particularly important when a texture is scaled, rotated, or otherwise transformed.
Choosing the correct texture filtering mode is essential for improving image quality, performance, and the overall visual experience in both 2D and 3D graphics.

Your sprites should now be clear.

The last thing we need to do for this part is set our Main scene as well, our main scene. In your Project Settings, underneath Application > Run, you can set your Main Scene here to be our newly created scene. This will then run this scene whenever we run our game. Later on, we will change this to be our menu scene, because you want the player to be greeted by the start menu instead of just throwing them into the game.

Congratulations, you’ve learnt how to navigate through the Godot Editor, as well as work with nodes and scenes — which are the core fundamentals you’ll use throughout your game It would be good practice for you to create your own GitHub repository for your project so that you can make regular backups of your project.
In the next part, we will set up our game character, i.e., our player, as well as add the functionality to move them around our game. That means more nodes, and you’ll get to work with Scripts for the first time! Remember to save your game project, and I’ll see you in the next part.
*You can also use the official Git Plugin from Godot, but as of July 2023, the Git plugin hasn’t been updated to work with Godot 4.1 and later yet.
TUTORIAL RELEASE
LINKS TO OTHER PARTS
The tutorial series has 23 chapters. I’ll be releasing all of the chapters in sectional daily parts over the next couple of weeks.
You can find the updated list of the tutorial links for all 23 parts in this series here.
FULL TUTORIAL
If you like this series or want to skip the wait and access the offline, full version of the tutorial series, you can support me by buying the offline booklet for just $4 on Ko-fi!😊

